 Movies and TV
Movies and TV
Movies and TV  Weird Stuff
 10 Historical Facts That Ruin Your Timeline
 History
 10 Maritime Folktales with a Real-Life Twist
 Crime
Crime 10 Notorious Prison Gangs That Became Criminal Empires
 Music
Music Top 10 Hit Song Lyrics That Became Cultural Catchphrases
 Weird Stuff
 10 Bizarre Viral Trends That Took Things Too Far
 Weird Stuff
 10 Plants That Eat Animals
 Movies and TV
 10 Mind-Boggling Reasons These Blockbusters Became So Expensive
 Misconceptions
 10 Common Misconceptions About Famous Scientists
 Creepy
 10 Prestigious Universities with Famous Ghost Stories
Movies and TV 10 Film Productions That Went Too Far
Weird Stuff 10 Historical Facts That Ruin Your Timeline
History 10 Maritime Folktales with a Real-Life Twist
Who's Behind Listverse?

Jamie Frater
Head Editor
Jamie founded Listverse due to an insatiable desire to share fascinating, obscure, and bizarre facts. He has been a guest speaker on numerous national radio and television stations and is a five time published author.
More About Us
Crime 10 Notorious Prison Gangs That Became Criminal Empires
Music Top 10 Hit Song Lyrics That Became Cultural Catchphrases
Weird Stuff 10 Bizarre Viral Trends That Took Things Too Far
Weird Stuff 10 Plants That Eat Animals
Movies and TV 10 Mind-Boggling Reasons These Blockbusters Became So Expensive
Misconceptions 10 Common Misconceptions About Famous Scientists
Creepy 10 Prestigious Universities with Famous Ghost Stories
10 Awesome French Military Victories You’ve Never Heard Of
In modern times, France has developed a reputation for being unsuccessful in war. This started during World War II when the French government surrendered in a matter of weeks.
Before then, however, France had a long and successful military history. From seizing Gaul by force after the fall of Rome to dominating Europe throughout the Middle Ages and again during the reign of Louis XVI, France was the strongest military force in Europe for centuries before it was eclipsed by Germany at the turn of the 20th century.
Even after 1900, France remained a significant military power. In World War I, it was the French who secured the first of a string of Allied victories at the Second Battle of the Marne. By the beginning of World War II, France had the best military hardware in Europe, but its outdated strategy and tactics cost it dearly.
Some of France’s greatest military successes are also their least known, and many of them came early in the country’s history. Here are 10 awesome French military victories you’ve probably never heard of.
10 The Mad War
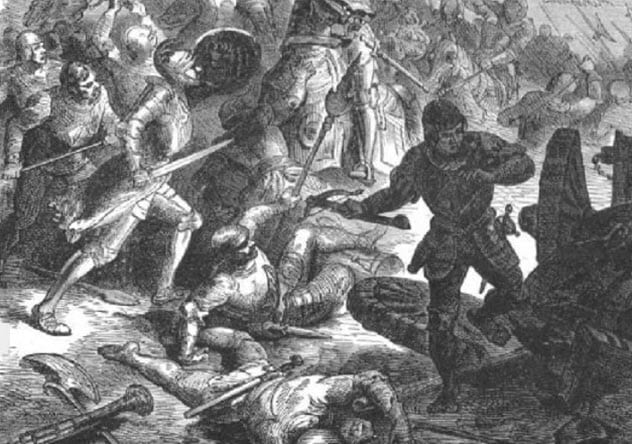
Photo credit: herodote.net
La Guerre Folle (aka “the Mad War”) took place between 1485 and 1488. King Louis XI had died, and Charles VIII wasn’t old enough to assume power. So the regency was placed in the hands of Anne de Beaujeu. The king’s cousin, the future Louis XII, wasn’t happy with this arrangement. When his bid to assume the regency failed, he fled to Brittany, which was independent.
The Bretons joined his cause alongside several powerful French vassals, including the Duke of Lorraine and Prince of Orange. They began a campaign against the French monarchy from the safety of Brittany.
Eager to capitalize on their enemy’s weakness, the rebels were supported by England, Austria, and Spain. All of them sent soldiers to Brittany to support the war effort. France declared the rebels traitors and began to plot the invasion of Brittany.[1]
Overall, the Breton army was made up of several thousand Bretons, reinforced by large contingents sent by the Spanish and Austrians and bolstered by a small host of 700 longbowmen from England. The English archers were led by Edward Woodville, who had defied the English king to be there. Henry VII had already decided not to send an army, but Woodville went anyway.
The two sides met at the Battle of Saint-Aubin-du-Cormier where the Breton army lay in wait. The French were caught off guard, and the Breton army had a strong position on a high ridge.
The English longbowmen harassed the French army as it formed up for battle, causing panic. However, the French cavalry (led by Italian mercenaries) was able to exploit a gap in the Breton formation, breaching their defenses. The French soldiers poured through and routed the Breton army.
It was a decisive victory for the French. The rebels were rounded up, and Brittany integrated into France. Brittany had been a common place of refuge for rebellious nobility since the fall of Burgundy, and its collapse meant that future French rebels had no safe haven from which to attack the monarchy.
9 Battle Of Bir Hakeim
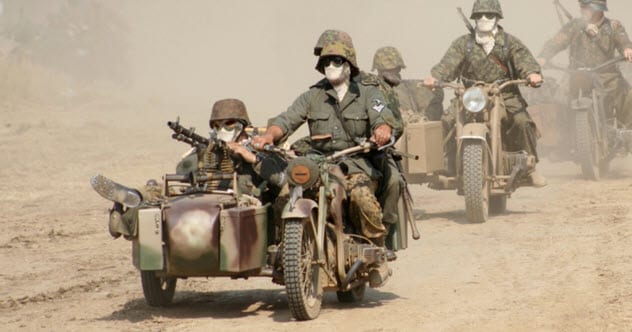
Photo credit: warhistoryonline.com
France famously capitulated within a few weeks of World War II beginning. However, the French government remained, setting itself up in exile in London. Many French soldiers rallied to the exiled government. They became known as the Free French.
Since France controlled much of Africa at the time, many Free French units were either already based there or were sent there to help oppose Hitler’s North Africa campaign. One of the most important Free French divisions was the 1st Free French Division, which was made up of the first soldiers to flee France and join the exiled government.
As part of the effort to halt the German advance, the British Eighth Army occupied several key positions in the Libyan desert. The 1st Free French Division, which was about 3,600 men strong, was sent to the old Ottoman fortress of Bir Hakeim.[2]
Their occupation of Bir Hakeim meant that the Germans had to make a significant detour to supply their army, so they laid siege to it in 1942. The Free French put up a much tougher resistance than the Germans expected and held out for more than two weeks against an army 10 times their size.
The Free French were eventually forced to retreat, but the holdup meant that the German general, Erwin Rommel, lost the crucial element of surprise he’d been hoping for. This would have allowed him to flank the Allied position.
The German plan to invade Malta was thrown into disarray, and Bir Hakeim directly enabled the crucial Allied victory at El Alamein shortly after. The courageous stand even led to Hitler calling them the second-best fighters in the world (after the Germans). The victory reminded the world that the French were still good fighters, and it bolstered the morale of the French Resistance in mainland France.
8 Battle Of Tours
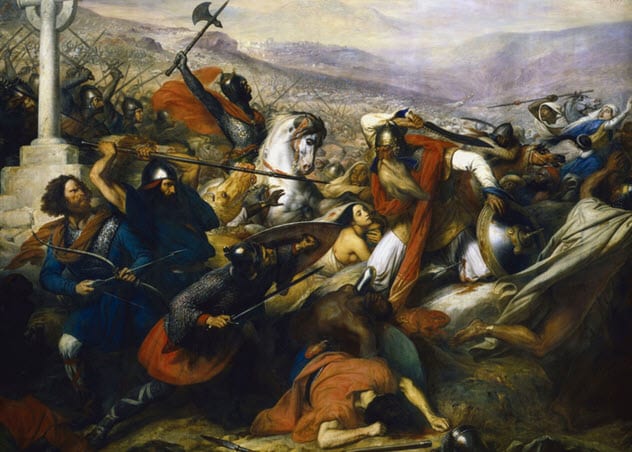
Photo credit: Charles de Steuben
In October 732, Charles Martel, leader of the Franks, entered battle with the soldiers of the Umayyad Caliphate just outside the city of Tours. His subsequent victory shaped the fate of Europe.
At the time, the Umayyad Caliphate was the most powerful military force in the world. Under the new generation of Umayyad caliphs, their empire had expanded dramatically, stretching from the borders of Persia to Spain and encompassing North Africa. Spain had recently fallen, and after consolidating their power there, the Umayyads were now looking further afield.
The Kingdom of the Franks (which would later become France) was the most powerful state in Europe. It didn’t come close to rivaling the might of the Roman Empire that came before it. However, through diplomacy and conquest, the Kingdom of the Franks had expanded rapidly and covered most of modern France, the Low Countries, and western Germany.
The Franks would be more than a match for the Umayyads. But between the two empires lay the small, independent Duchy of Aquitaine, which the Umayyads soon set their sights on.
The Umayyads made short work of Aquitaine, but the Duke of Aquitaine, Odo, called on Charles for help. Charles answered, and when the Umayyad army made its way toward Tours, intending to loot and burn it, they found a large Frankish army in their way.
The Umayyad army, led by Abdul Rahman Al Ghafiqi, tried to force the Franks to abandon their vantage point in the hills where the powerful Umayyad cavalry couldn’t harm them. But Charles held his ground. With winter approaching, the Umayyad army couldn’t afford to wait, so after seven days, they attacked the Frankish army.[3]
Usually, heavy cavalry would have expected to defeat an army of infantry with no problem, but Charles’s army was superbly drilled and experienced, having campaigned with him for years. They used a phalanx formation and held their nerve against successive cavalry charges, though the Umayyads broke their ranks several times.
At some point during the battle, a rumor broke out among the Umayyad army that some Franks had crept around the back and were looting their camp. Whether or not this was true, it caused a large portion of the army to break away to protect their loot.
When the rest of the army saw them fleeing, they broke, too. Al Ghafiqi was killed in the ensuing chaos, ensuring the Franks’ victory. When the Franks emerged from their camp the next day, they found that the Umayyad army had fled overnight.
7 War Of Saint-Sardos
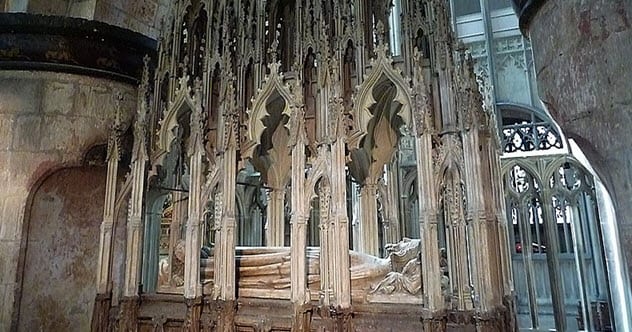
Photo credit: Chris Gunns
Although most of these victories were won through force, the War of Saint-Sardos was a masterclass in diplomacy. As it stood, the King of England, Edward II, was also the Duke of Aquitaine in France. This meant that while there were English laws and English soldiers in Aquitaine, the English king had to frequently journey to France and give homage to the French king as his lord.
Meanwhile, in Aquitaine, many local landholders were turning to the French Parlement to settle their disputes rather than the English courts. Unsurprisingly, the Parlement nearly always ruled in France’s favor. One by one, small landholdings and villages were returning to direct French rule.
Things came to a head when the Aquitanian town of Saint-Sardos became the center of a dispute. The local monastery wanted to turn the village into a border fort for the French king, while other local landowners wanted to remain under English protection. Some days after, a local lord burned down Saint-Sardos and lynched its sergeant. The French accused the English of ordering the crime.[4]
The English ambassadors desperately tried to stall the situation, making promises and apologizing while saying they would sort the matter out themselves. The French king saw his opportunity, however, and invaded Aquitaine. The English were caught completely off guard, and the war was over within six weeks.
Most of the duchy was now in French hands, and the English had suffered a couple of embarrassing defeats. The diplomatic failure turned many English lords in England against the king and led directly to the collapse of his authority. This made him vulnerable to the coup that ousted him in 1327.
6 Battle Of Austerlitz
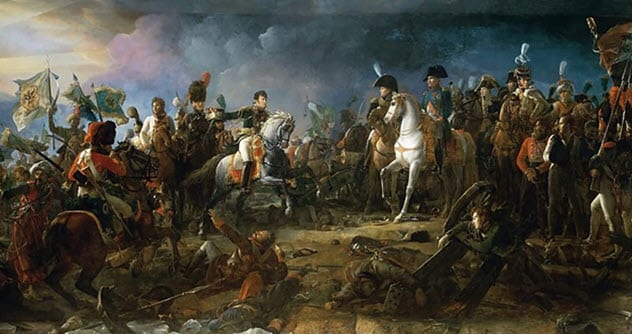
Photo credit: Francois Gerard
Napoleon is often lauded as one of the greatest generals of all time. Even though he ultimately lost the Napoleonic Wars, France was able to stand alone against a united Europe for over a decade through his leadership. Many of his greatest victories came early in his career, however. If he had been able to continue with the same momentum, he might actually have been victorious.
During the War of the Third Coalition, he led his army into Austria with the aim of knocking Austria out of the war. He devastated the Austrian army during the Ulm Campaign in October 1805, and by December, he had conquered Vienna. The Austrian army avoided conflict with him until the arrival of the Russians. The Austrians planned to join up with the Russians and drive Napoleon out.
Both Tsar Alexander and Napoleon realized that the French army was overextended, so the original Russian plan was to withdraw further, forcing the French to stretch their supply lines even more. In response, Napoleon decided to lay a trap.
He used several techniques to convince the allies his army was weaker than it was. He sent a letter expressing his reluctance to enter battle, secured an armistice, and withdrew his army rapidly from Pratzen Heights, creating the impression of an army in disarray. The moves were enough to convince the allies to throw out the Russian plan and launch an attack.[5]
The allied army was made up of around 85,000 men. Napoleon’s army initially appeared to be 53,000 strong, but his numbers shot up to 79,000 as forced marches drew his contingents back to the main army over the course of the battle. The allies planned to launch a heavy attack on Napoleon’s right flank, hoping to break his soldiers and cut off their supply line.
Napoleon had already guessed they would do this and purposely weakened his right flank. As the battle progressed, the rest of his army—which he deployed on his left flank—retook the hill they’d abandoned earlier and surged down into the weak allied central and left flanks, shattering them.
The momentum turned in Napoleon’s favor, and after a few more hours of fighting, the battle was over. The French had taken under 10,000 casualties, but the allies sustained 16,000 and the French captured 20,000 more.
In the treaty that followed, Austria was forced out of the war. They agreed to pay reparations to France while acknowledging Napoleon’s conquests. As a direct result, the Holy Roman Empire, which was over 1,000 years old, was dissolved the year after.
5 Hundred Years’ War
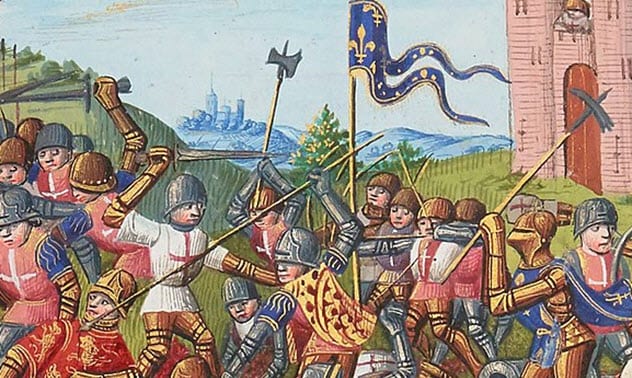
Photo via Wikimedia
Lasting from 1337 to 1453, the Hundred Years’ War featured some of the most famous victories in English history. At Crecy, Poitiers, and Agincourt, the English longbowman was proven to be the most effective soldier of late Medieval Europe. However, the war was also a decisive victory for the French, resulting in the permanent end of four centuries of English territorial influence on the continent (with the exception of Calais).
The victories at Crecy and Poitiers may actually have hindered the English overall, encouraging successive kings to pour money and resources into a war with an enemy who considerably outmatched them in population and resources. While Agincourt was considered one of the greatest victories in English history, it followed a period of 30 years in which the English had been defeated in every battle they had fought against France.[6]
The war was ultimately brought to an end by the Battle of Castillon. The French army feigned retreat, and the English, under the command of the impetuous and venerable general Lord Talbot, chased them enthusiastically. The English fell into a French ambush, where the French artillery (which was some of the most advanced in Europe) opened fire from fortified positions in the French camp, which the English thought was abandoned.
The English army was finished off by a large cavalry charge. When the dust settled, the English had lost thousands of men, while the French had lost around 100. The internal struggles, now known as the Wars of the Roses, put an end to any English hope of launching another invasion.
4 French Invasion Of Normandy
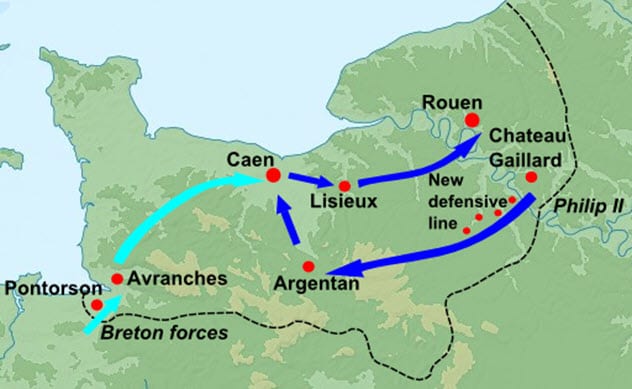
Photo credit: Eric Gaba
England and France had waged war over the fate of Normandy on and off for decades by the time hostilities resumed in 1202. This time, however, the French were facing the bumbling King John, who was already struggling to maintain order among his nobility. Several of them were so strongly opposed to John’s rule that they flipped to the French side and joined the effort to conquer Normandy.
Things changed, however, after John’s decisive victory at the Battle of Mirebeau. In one fell swoop, John had eliminated the Lusignan army and captured all the rebels who were conspiring with France against his rule. In the aftermath, he reinforced his castles in Normandy. The king of France, Philip II, was forced to turn back and defend the French borders from John’s army.
However, John’s mistreatment of his prisoners turned more of his supporters in Normandy against him. The final straw came in 1203 when John, supposedly drunk, had the Duke of Brittany (and arch-rebel) tied to a stone and drowned in the river Seine.
Philip capitalized on this by laying siege to the crucial fortress of Chateau Gaillard while also cultivating support among the disgruntled nobles in eastern Normandy. John tried and failed to relieve the siege before heading to Brittany and then retreating to England.[7]
Philip conquered Gaillard in March 1204, by which point resistance to his rule had collapsed. By August, through military and diplomatic skill, Philip controlled Normandy, Poitou, and Anjou. Meanwhile, Brittany had turned against John. England’s final French possession was the Duchy of Aquitaine.
3 Battle Of Bouvines
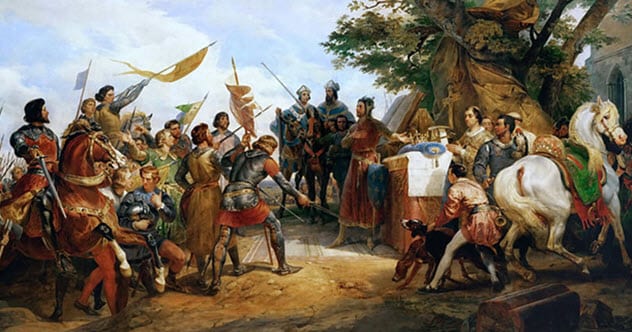
Photo credit: Horace Vernet
King John tried to recover his lost lands nearly a decade later when he joined Pope Innocent III’s effort to build an international coalition against France. Leaders in Germany, the Low Countries, and England all united in their efforts to reverse the French conquests of Normandy and in modern-day Belgium and the Netherlands.
Initially, the plan was for John to land in western France and raise soldiers in Gascony and Aquitaine while the rest of the coalition approached Paris from the north. However, the English campaign was ended by the battle at La Roche-aux-Moines, leaving King Philip free to engage the northern army.
The English joined the German army in Flanders, making the army 9,000 strong in total. Philip’s army numbered just 7,000, but he could rely on a large amount of heavy cavalry. The battle raged for some time, but the coalition’s flanks collapsed one after the other under the weight of continuous cavalry charges. The commanders of both flanks, William Longespee and Ferrand of Flanders, were captured over the course of the battle, causing their soldiers to flee.
Then the French began to encircle the German center, who had been holding their ground, and drove them back. The allied army was all but defeated. But Reginald of Boulogne made a defiant last stand with around 700 pikemen, who held out for hours before being defeated by a mass charge.[8]
This brave stand may have saved the coalition army from hundreds more casualties. Night was beginning to fall by the time they were defeated, and the French decided not to pursue.
Following their utter failure, King John was forced to sign the Magna Carta and was ultimately overthrown. The German emperor, Otto, was deposed and replaced the following year.
2 Second Battle Of The Marne
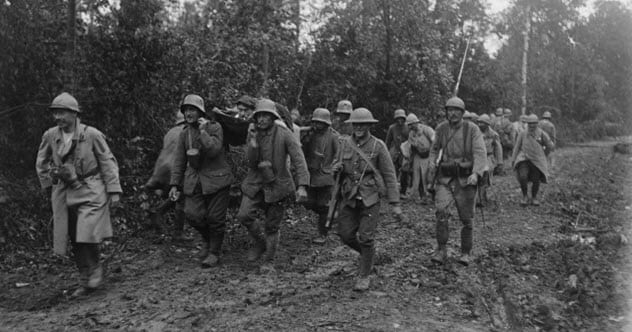
Photo credit: iwm.org.uk
In an attempt to bring World War I to an end, the Germans launched the Spring Offensive in March 1918. They hoped to surge through France and force a surrender. Although they failed, they still made significant territorial gains, and the German generals resolved to continue their campaign through the summer by launching an all-out assault through Flanders. As part of this plan, they launched a diversionary attack along the River Marne, hoping to scare the Allies into reinforcing their lines since they were so close to Paris.
According to the German General Ludendorff, the first two days of the battle were “the very pinnacle of military victory.” They were easily able to capture the French front defenses, surging through them so quickly that they had to halt their advance so their artillery could get back into range.
The German stormtroopers were able to seize several bridgeheads on the Allied side of the river. They didn’t know, however, that the Allies had pulled back purposely, planning to launch a devastating counterattack the next day.
The French were reinforced by 85,000 British and US troops on the night, and the next day, they started their offensive. Due to reconnaissance and information extracted from captured German soldiers, the Allies knew the German battle plan in intimate detail. They’d also ensured the Germans got their hands on a false Allied plan, so the Germans bolstered their defenses based on this plan.[9]
On July 18, the Allies began their counterattack. By the 20th, the Germans issued the order to fall back. It was the first in a string of victories for the Allies that led to the end of the war just three months later.
While the Allies sustained higher casualties, it was considered a significant tactical and strategic victory: The Allies had bolstered their own morale with the victory while crippling that of the Germans. The Allies never took a further step back before the end of the war in November.
1 Battle Of Malakoff
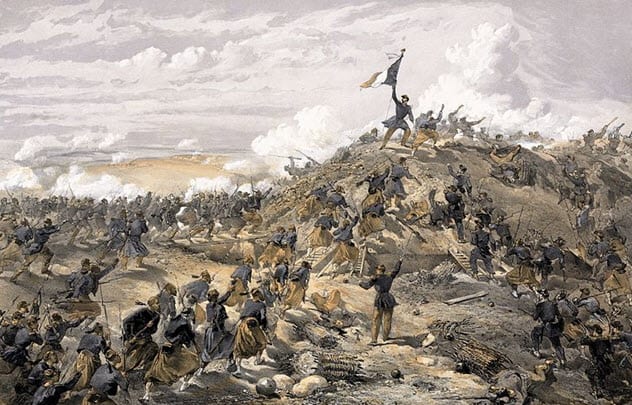
Photo credit: William Simpson
The first half of the 1800s was the story of Russia’s rise. By 1850, they were an emerging power on the European stage with a powerful fleet in both Sevastopol and St. Petersburg. Meanwhile, the Ottoman Empire, the major power in the Black Sea since the Middle Ages, was in continual decline and militarily weak.
This situation didn’t suit the French or the British, who were determined to maintain the status quo in Europe. So when a crisis broke out between the Ottomans and the Russians, the French and the British were quick to assure the Ottomans of their support if it turned into a war.
Sure enough, the Ottomans declared war on Russia shortly after. Britain and France landed soldiers in Crimea, set on removing Russian influence over the Black Sea. From the very start, the key target was the Russian port of Sevastopol, the base of their southern fleet and therefore their power projection in the Mediterranean.
Of course, both sides recognized the importance of Sevastopol, so the Russians fortified it heavily. The French and British laid siege to it, and from then on, the two sides were caught in a stalemate. The French and British lacked the artillery they needed to destroy the Russian defensive positions, but the Russians lacked the military and strategic ability to drive out their enemies’ infantry.[10]
The months dragged on, and both sides lost more men to disease and the weather than to each other. The Russian winter loomed on the horizon, prompting the British and French to act. However, the British were unable to devise a plan to defeat the Russians. After several government crises, withdrawal looked like the only option.
One last effort was planned to take the port: a heavy naval bombardment followed by a joint British-French assault. The French would attack the fort at Malakoff while the British would attack the Redan. Using their ships as artillery, the allies were able to reduce the Russian artillery defenses enough to launch their assaults. But the fighting was chaotic.
The British successfully seized the Redan but were driven out after several hours by determined Russian soldiers. The French assault on Malakoff, however, was successful after a desperate attack along the whole right side of the city. They held out against Russian counterattacks, securing a breach in the defenses that the allies could use to take the port.
The victory was crucial. It meant that the siege wouldn’t continue through the winter, in which hundreds of soldiers would have died. Following the defeat, the Russians evacuated the city and burned their whole fleet in the harbor to prevent the allies from taking them.
Read more intriguing stories about French military history on 10 Blunderful Moments In French Military History and 7 French Military Victories of the 20th Century.
More Great Lists
 10 Awesome Medieval Knights You've Never Heard Of
 10 People You've Never Heard Of Who Changed The World
 10 Religions In The Middle East You Have Never Heard Of
 10 Amazing Women You've Never Heard Of
 10 Strange Societies You've Probably Never Heard Of
 10 UFO Encounters That You've Never Heard About
 10 Best Radio Hoaxes You've Never Heard Before
 10 Creepy Ghost Animals You've Never Heard Of
 10 Amazing Castles In Europe You've Probably Never Heard Of
fact checked by
Jamie Frater
More Great Lists